
Upload Files
Upload files to Drylab from the chatbox or straight into the Vault, follow their status until they're ready, and check the size limits.
You can upload from the chatbox (quickest when you're about to ask a question about the file) or from the Vault (best for organizing data in advance).
From the chatbox
- Click + (Upload files or mention resources) in the chatbox.
- Choose Upload file or Upload folder and select what to upload.
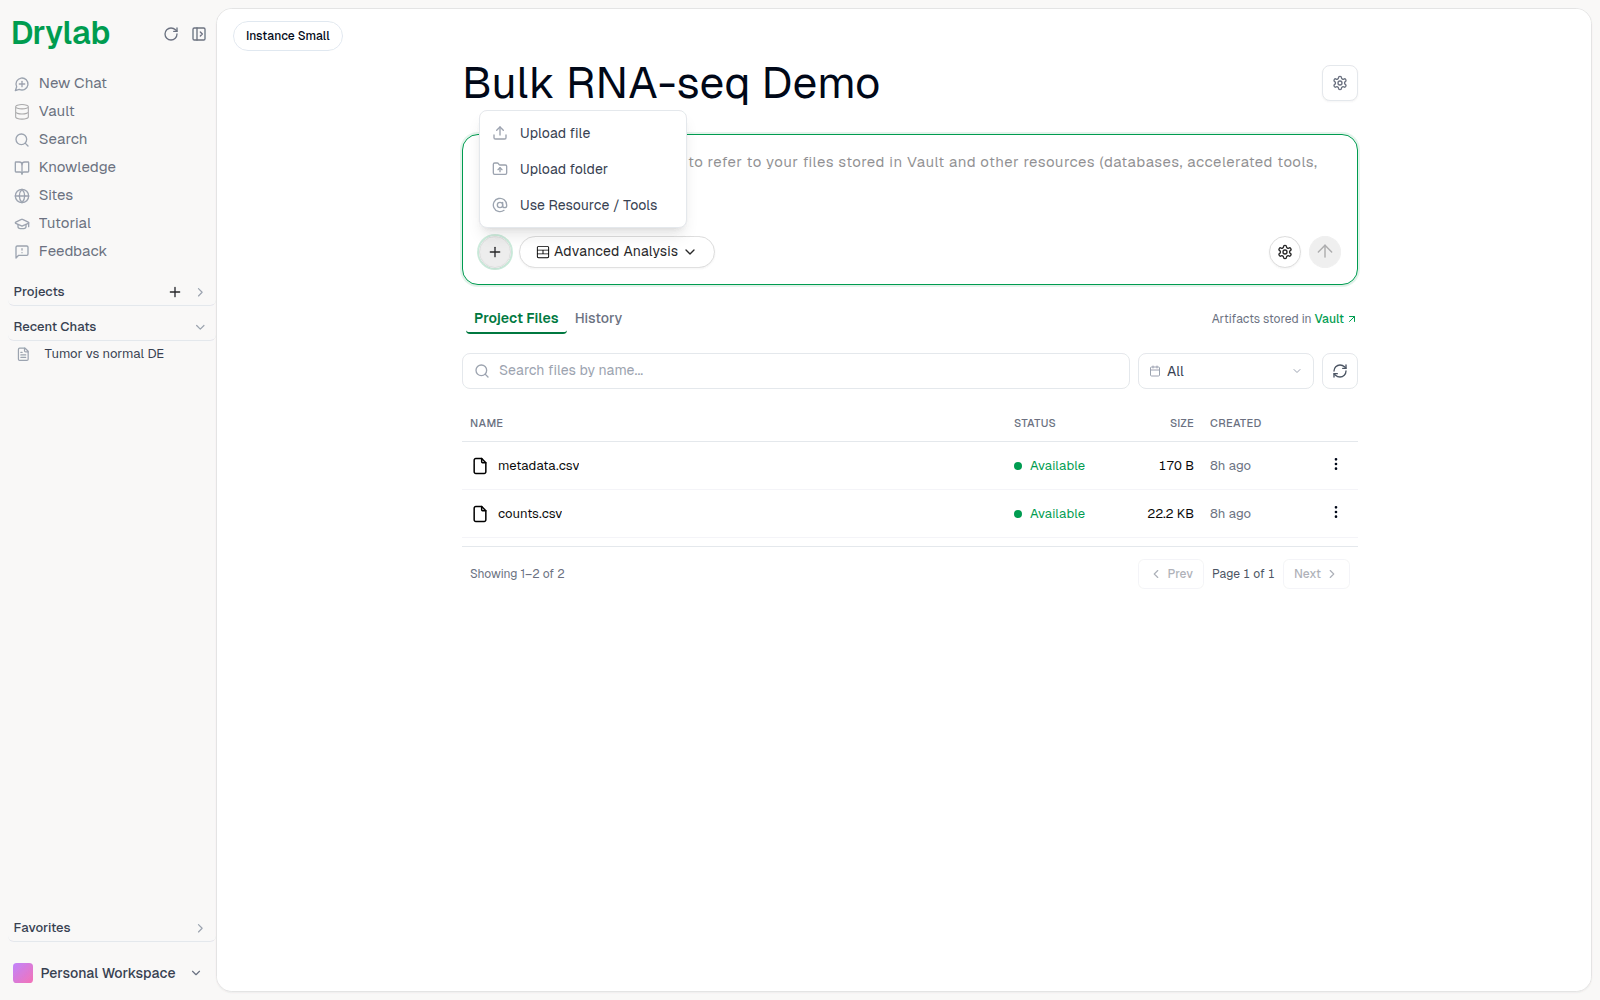
You can also drag files onto the chatbox, or paste images with Ctrl + V (Cmd + V on macOS).
Files you upload from the chatbox go into the current project's Project Files folder (the Default Project if none is selected), so they show up in the @ picker for every chat in the project. Pasted images are saved in the project folder itself. See Mention Files and Resources.
From the Vault
-
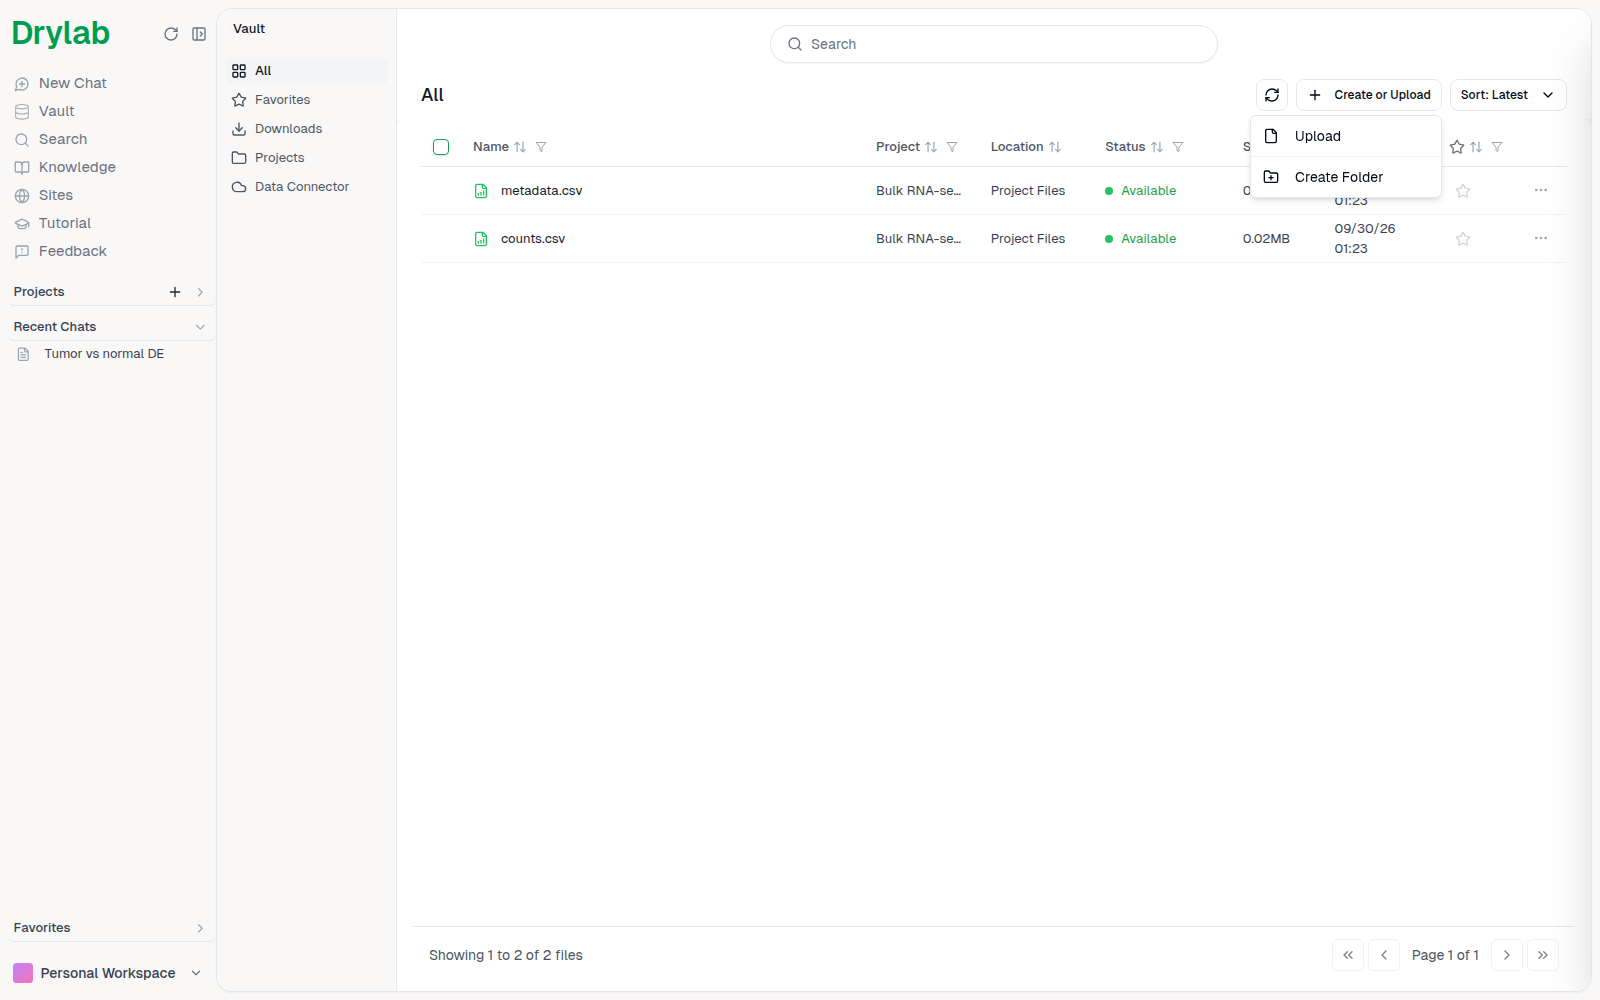
Open Vault and click Create or Upload (not available in Favorites or Downloads).
-
Choose Upload (or Create Folder to make a new folder first).
-
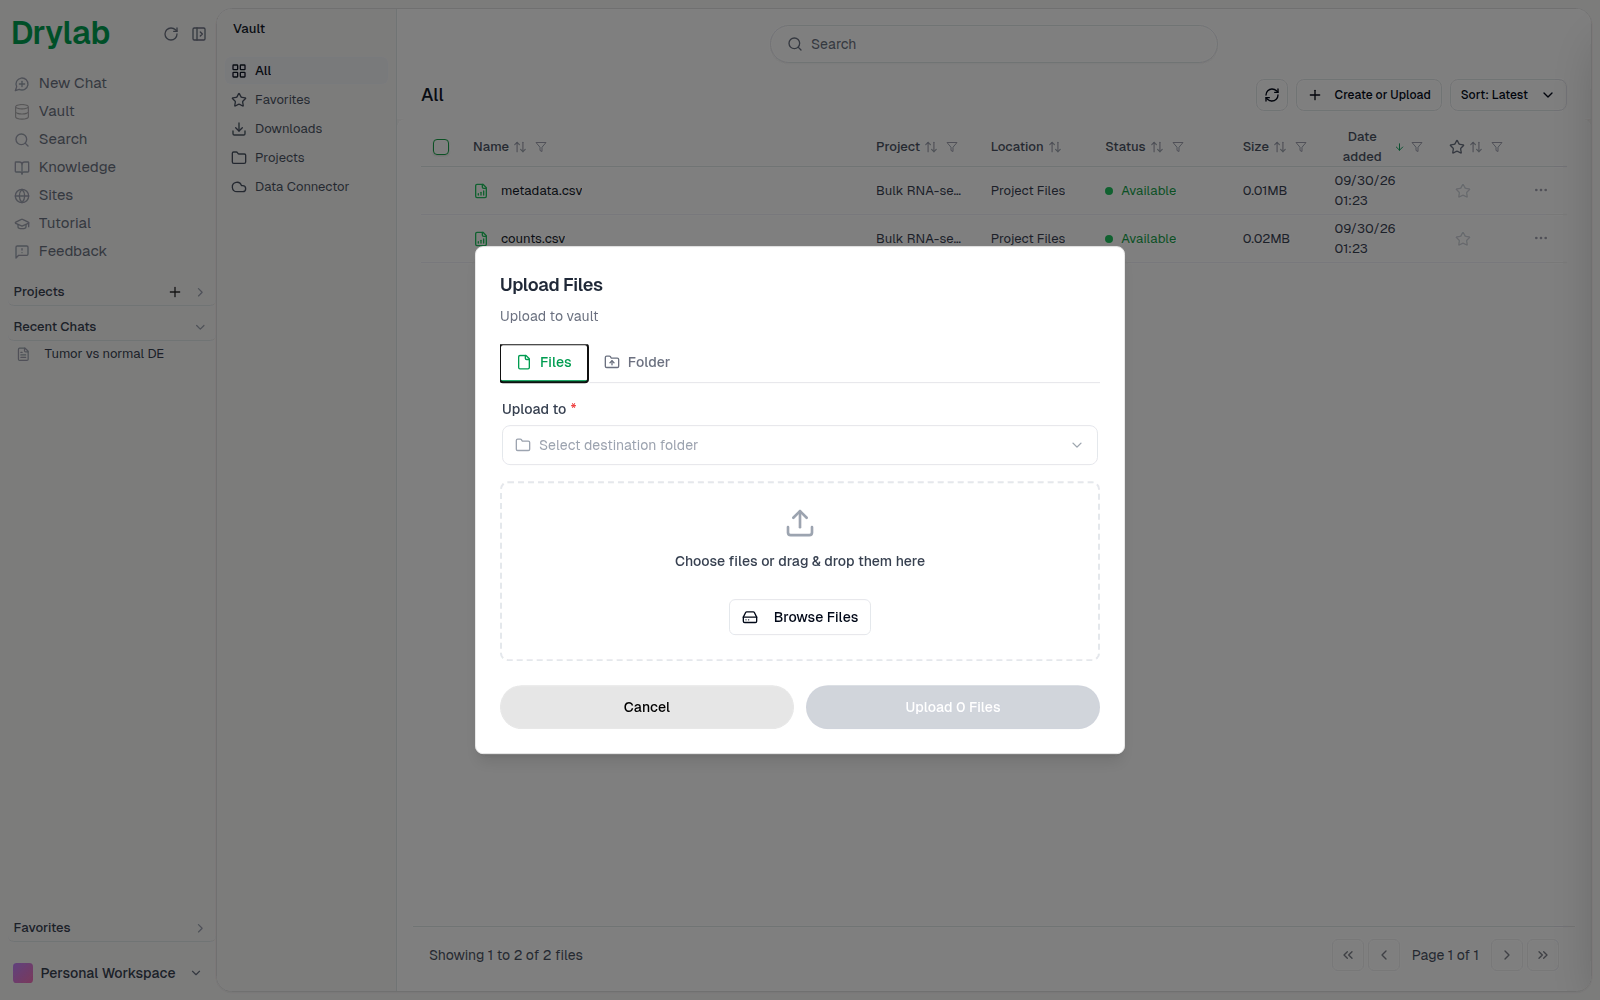
In Upload Files, choose Files or Folder, pick the destination under Upload to, then click Browse Files or drag and drop files into the window.
-
Click Upload N Files (or Upload Folder). New files show Uploading (sometimes Processing or Waiting) until they're ready, then Available.
Size limits
- Individual files can be up to 30 GB.
- Your plan sets your total storage and the maximum data size per analysis. If you go over, Drylab shows a message such as "Storage limit reached.", "Data size exceeds plan limit." or "File exceeds the upload size limit." See Usage & Consumption.