
Local Runtime
Run Drylab analyses on your own computer or server instead of a Drylab cloud sandbox, so your raw files stay on your machine.
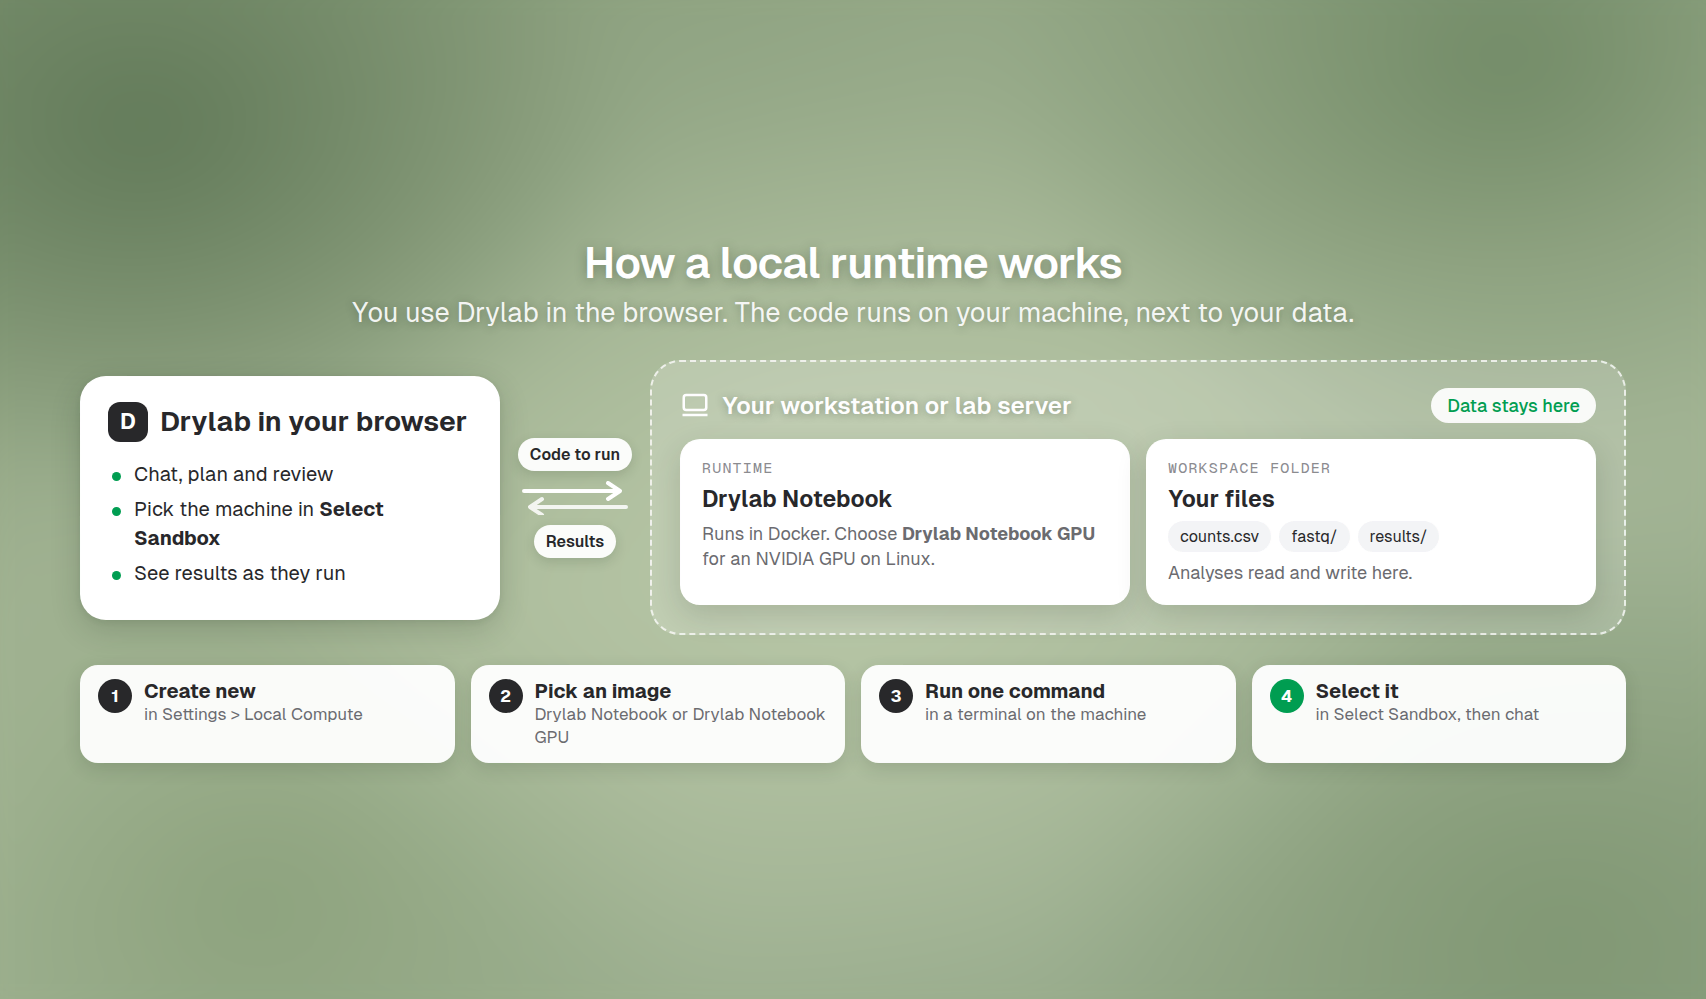
A local runtime lets you use Drylab in your browser while the code runs on a machine you control: a workstation, a lab server or a university server. Drylab plans and writes the analysis; your machine runs it, next to your data.
When to use a local runtime
- Sensitive data that must not leave your infrastructure, for example patient data.
- Large datasets that already live on a server, so you don't upload terabytes.
- Hardware you already have, including your own NVIDIA GPU.
Working on a laptop instead? The Desktop App sets up a local runtime on your computer for you. To reach an HPC cluster or a restricted server over SSH, see Connect Servers & HPC.
Before you start
- Plan: a local runtime is included in the Lab Basic, Lab Plus, Lab Pro and Enterprise plans. On other plans, Local Compute shows "Local Runtime is not included in your plan" with an Upgrade plan button.
- Docker: Docker Desktop (macOS or Windows) or Docker CE (Linux). If Docker is missing, the installer offers to install it for you on Linux (and on macOS if Homebrew is installed). On Linux it can also add Docker Compose.
- GPU (optional, Linux): an NVIDIA GPU with drivers. When you choose Drylab Notebook GPU, the installer can set up the NVIDIA Container Toolkit.
- Network: outbound internet access, so the runtime can connect to Drylab.
- Disk: enough space for the Drylab image and your workspace.
- Windows: run the installer inside WSL, or use the Desktop App.
Set up a local runtime
-
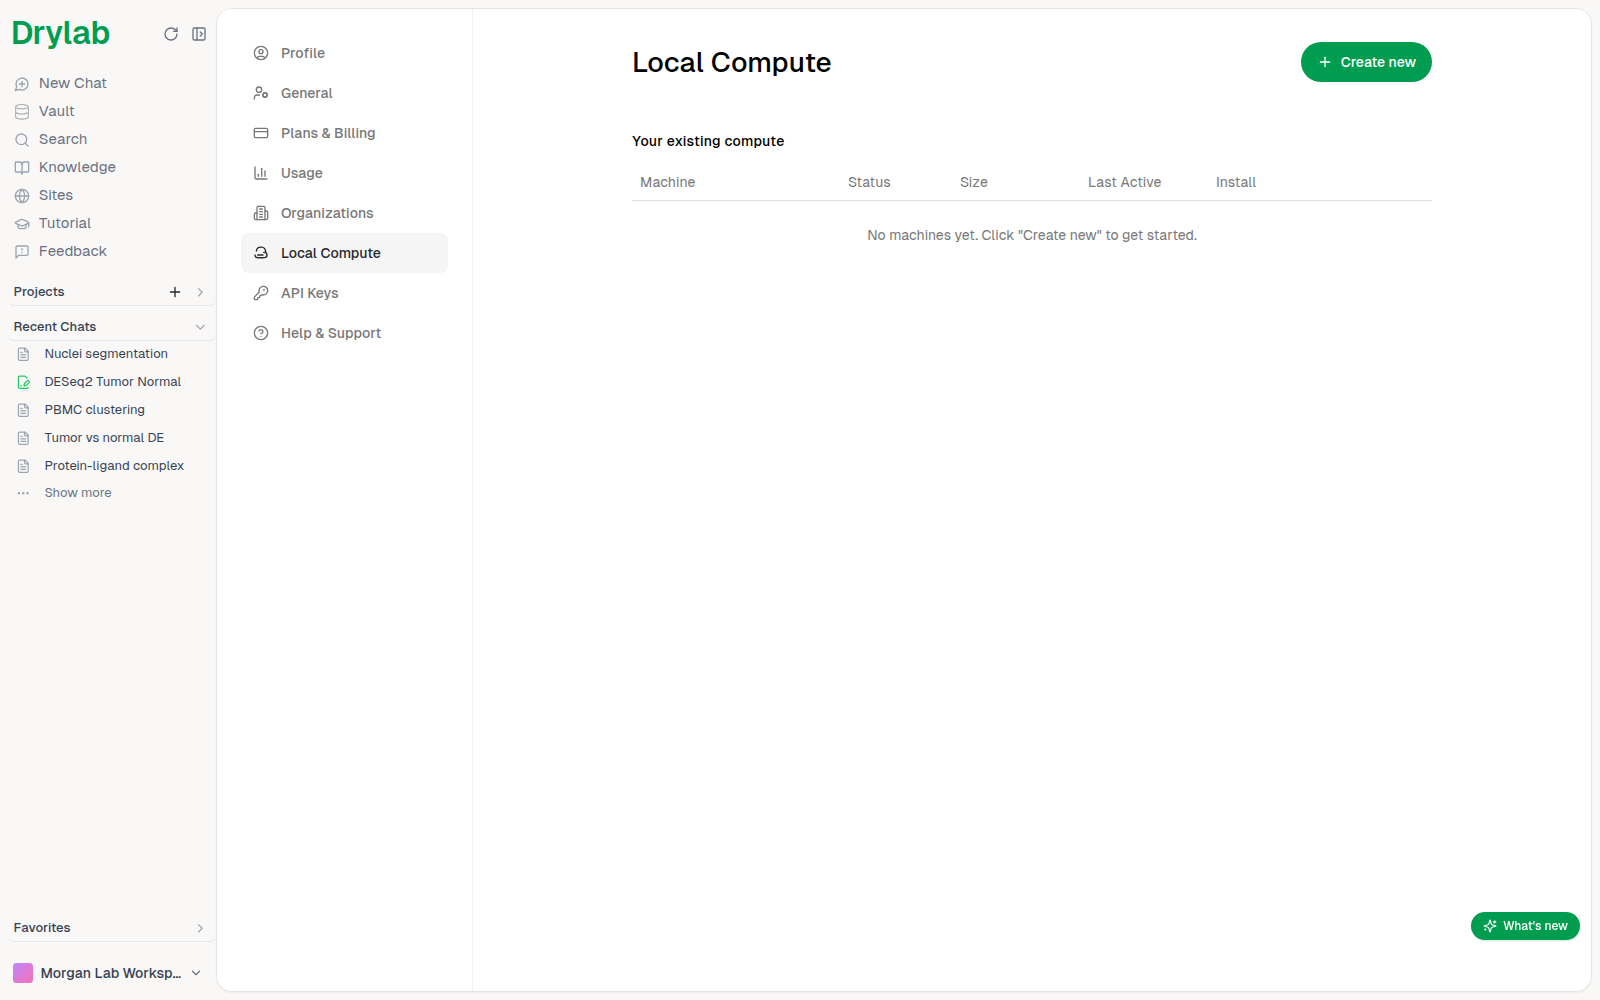
In Drylab, click your workspace at the bottom of the left sidebar, choose Settings, then Local Compute.
-
Click Create new to open Create a local runtime.
-
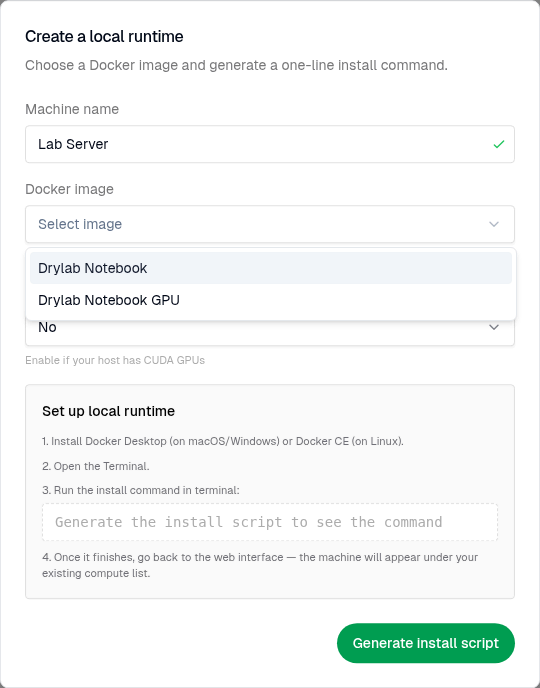
Fill in the form:
- Machine name: a name you'll recognize, for example
Lab Server. Each machine needs its own name. - Docker image: Drylab Notebook, or Drylab Notebook GPU for a Linux machine with an NVIDIA GPU.
- Choose GPU machine: Yes if the machine has CUDA GPUs.
- Machine name: a name you'll recognize, for example
-
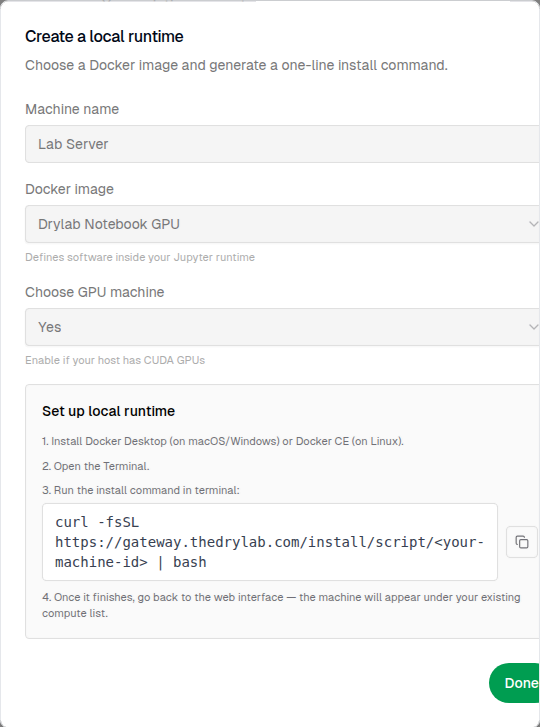
Click Generate install script (the button then changes to Done), and copy the command under Run the install command in terminal.
-
Open a terminal on the machine and run the command. It looks like:
curl -fsSL https://gateway.thedrylab.com/install/script/<your-machine-id> | bashCopy the real command from your own Settings page; it contains your machine's ID.
-
Follow the installer's prompts. It checks Docker, asks you to accept the privacy policy, and asks for a Workspace path where your files will live (by default a
workspacefolder in the directory you run it from). It can also set up SSH and Slurm access (see Connect Servers & HPC). -
When setup finishes, the installer keeps running in the terminal and shows "Press Ctrl+C to stop the runtime." Leave that terminal open; pressing Ctrl+C stops the runtime. To run it in the background instead, see
--detachbelow. -
Back in Local Compute, the machine appears under Your existing compute. Its status changes from disconnected to pending, then active once the runtime is running.
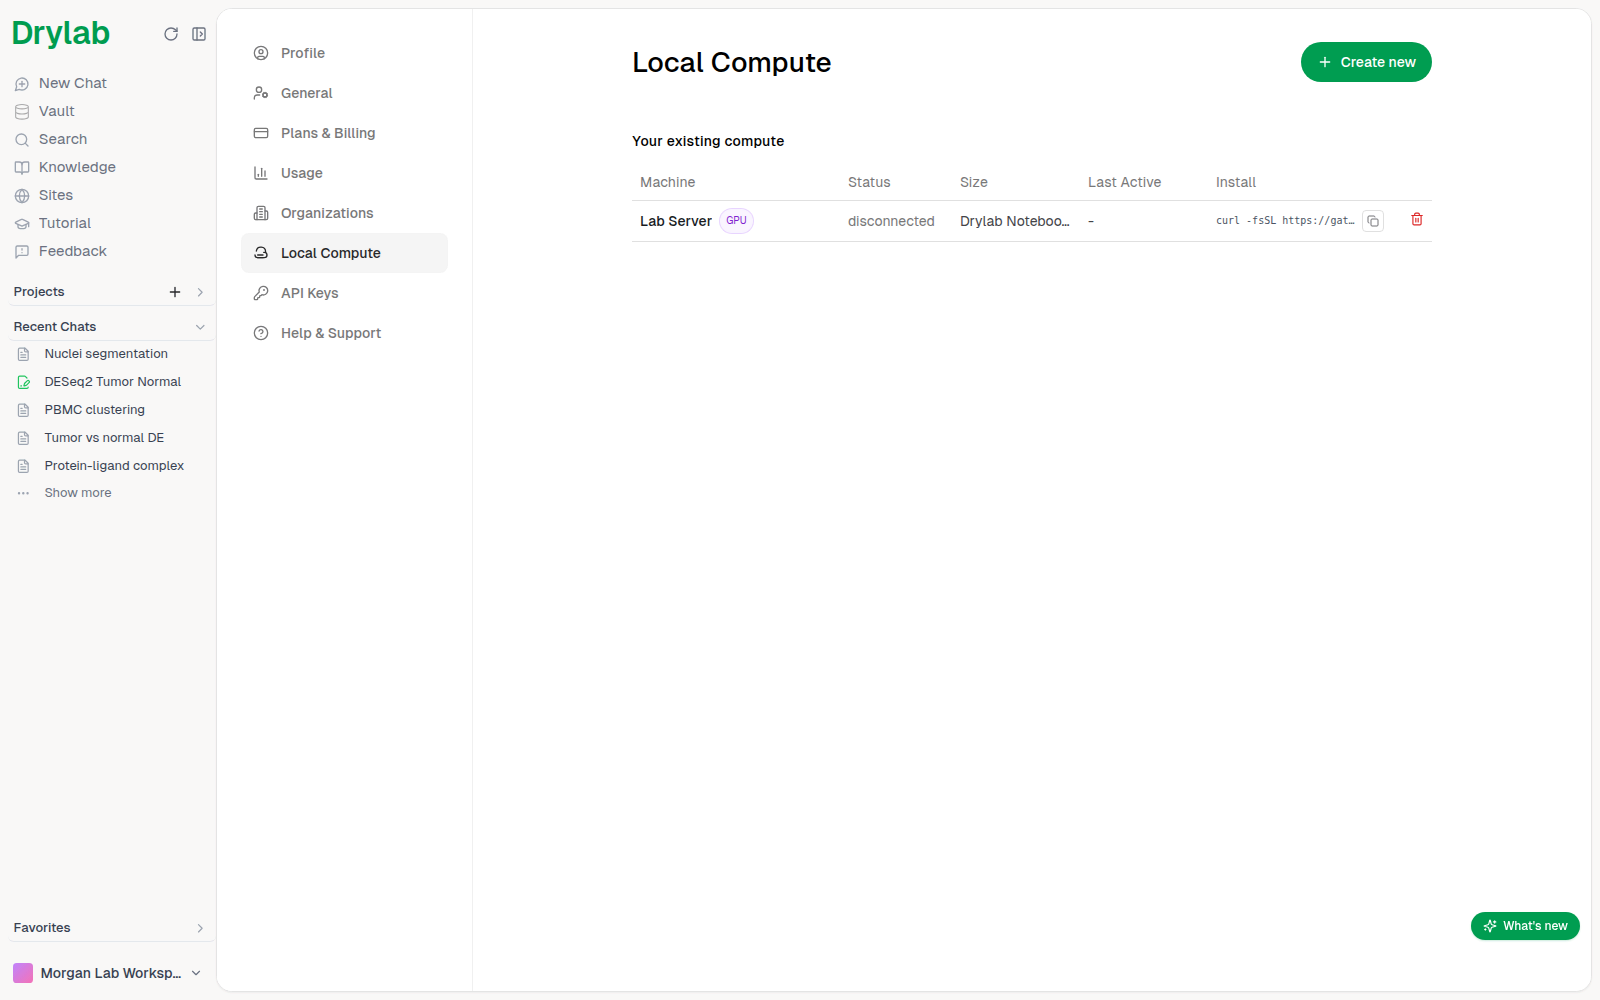
The Install column keeps the command for each machine, so you can rerun it later, for example to reinstall or repair the runtime.
On a phone or tablet
You can create the runtime and copy its command from a small screen, then run the command on the machine itself.
- In Settings, the sections appear as a row of tabs at the top. Tap Local, then Create new.
- Create a local runtime fits the screen. Long install commands wrap onto several lines; tap the copy button next to the command to copy all of it.
- On a narrow screen, swipe the Your existing compute table sideways to see the Install column.
Use the local runtime
In a chat, open Select Sandbox and pick your machine under Local Runtime. New analyses in that chat run on the machine and read and write files in its workspace folder. See Select a Sandbox.
A chat stays tied to the machine it started on. If you switch that chat to another sandbox, it opens in View Only Mode until you switch back.
Accelerated tools still run on Drylab's GPU hardware, even when your chat uses a local runtime. To use one, Drylab uploads that tool's input files to your Vault.
What stays on your machine
Your raw files stay in the workspace on your machine. To write and fix the analysis code, the runtime may send Drylab a small amount of information about your data: column names, the data's shape and types, a few sample rows, and errors. Full files are only uploaded if you choose to, for example by saving them to the Vault or using an accelerated tool.
Manage the runtime on the machine
The installer puts a drylab command in ~/.local/bin on the machine. If your terminal can't find it, add that folder to your PATH (the installer prints a note when it isn't). Run these in a terminal on the machine:
| Command | What it does |
|---|---|
drylab local list | List the runtimes installed on this machine |
drylab local run --machine-id <id> | Start the runtime again, for example after a reboot. Add --detach to keep it running in the background |
drylab local stop --machine-id <id> | Stop the runtime |
drylab local doctor | Check Docker and the other requirements |
drylab local uninstall --machine-id <id> | Stop the runtime and remove its install files. Your workspace folder is kept |
<id> is the machine ID from your install command. Run drylab local list to see it.
Best practices
- One machine, one name. Use clear names such as
Lab Server GPU, so you pick the right one in Select Sandbox. - Put the workspace on a big disk. Choose a Workspace path with room for your data and results.
- Keep it running. The runtime only works while the machine is on and the runtime is running. Use
drylab local run --machine-id <id> --detachso it doesn't depend on an open terminal, and start chats that need it when it shows active. - Use the GPU image only on GPU machines. Drylab Notebook GPU needs an NVIDIA GPU on Linux; use Drylab Notebook everywhere else.
- Remove old machines. Delete entries you no longer use from Your existing compute.
Troubleshooting
| Problem | What to do |
|---|---|
| The machine stays disconnected | Check the machine is on and connected to the internet, then run drylab local run --machine-id <id> --detach |
| The installer says Docker is required | Install Docker Desktop or Docker CE, then run the install command again |
| GPU isn't used | Make sure you chose Drylab Notebook GPU and Yes for GPU, and that nvidia-smi works on the machine |
| "This name is already in use" | Pick another Machine name |
| Something else is wrong | Run drylab local doctor, or rerun the command from the Install column |
Local vs cloud
| Local runtime | Cloud sandbox | |
|---|---|---|
| Where code runs | Your machine | Drylab cloud instance |
| Where files live | The workspace on your machine | Your Vault |
| Hardware | Whatever your machine has, including your GPU | Instance Small or Medium |
| Setup | One-time install | None |
| Availability | While the machine is on and connected | Always |
| Best for | Sensitive or very large local data | Everything else |